 |
Today I am going to discuss every single point which will help you to Push iOS App to the App Store . Any buddy can push iOS App to the App Store very easily.
So, Dont forgot to Follow my Blog. Without any late, let's get started.
Steps Required to Push your App
Step 1 ) I am considering that you have a Apple Developer Account with Developer Program Membership of 99 $ USD / Year . It may be Single account or Organizational account. If you dont have Apple Developer Account than please go to create a Developer account first. then come back and continue from here.
Step 2 ) Login your Developer Account Click Here. After login go to Certificates, Identifiers & Profile Section.

Step 3 ) First of all you need to Register your App to the App Store. It means create App Id for your App. if you already registered then skip this just go ahead.

Select Identifiers option from side menu.

Click + rounded Plus Button (Left Top Corner) .
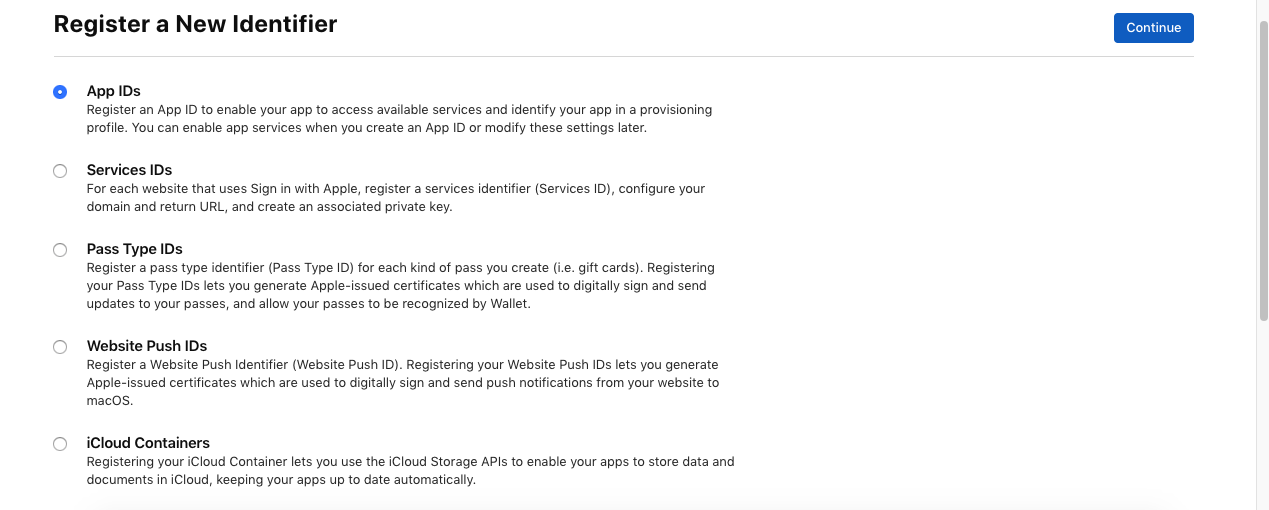
Choose default option i,e App IDs

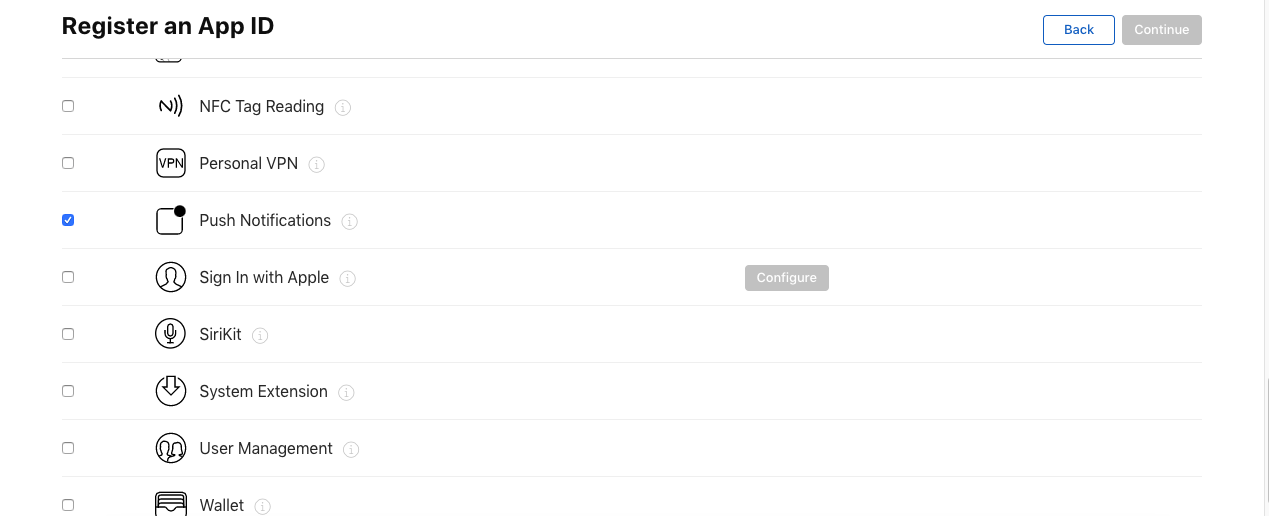
Now fill all the details Descriptions & Bundle ID and Select option Explicit not Wildcard. The default option looks good. In Capabilities Section Choose some options which you are using in your app Like :- Push Notification , InApp Purchase etc.
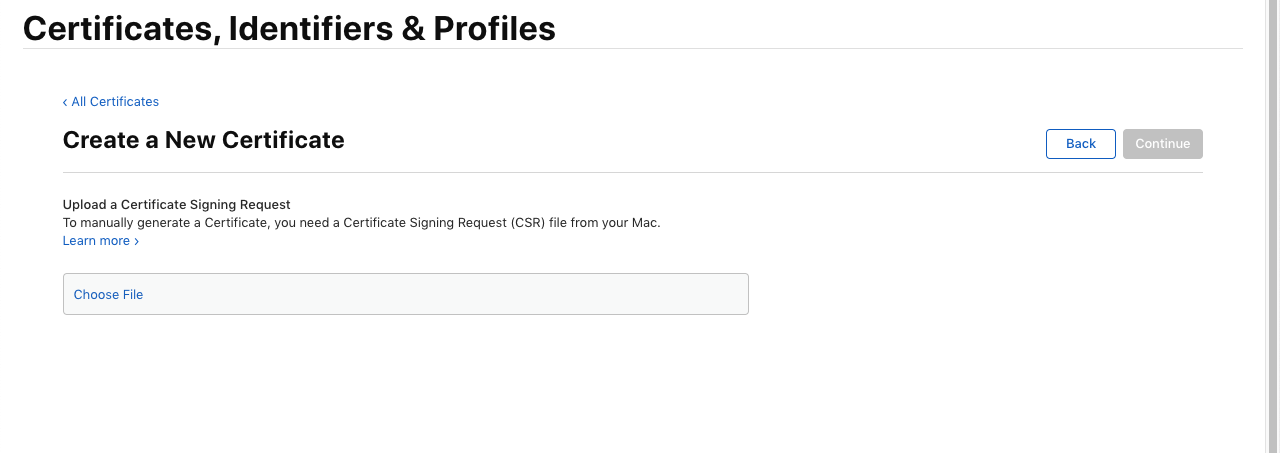
Step 4 ) Create the certificate with the signing certificate (which will create from your system ) .
Go to Certificates options from side menu and Click Plus button to create a new. select the option from the list.

After that we have to upload CSR File. Now we have to create a CSR file from our MAC KeyChain Access .
After that create the signing certificate form your system , open the keychain of your system and follow the below-given screenshot (to see zoom it)
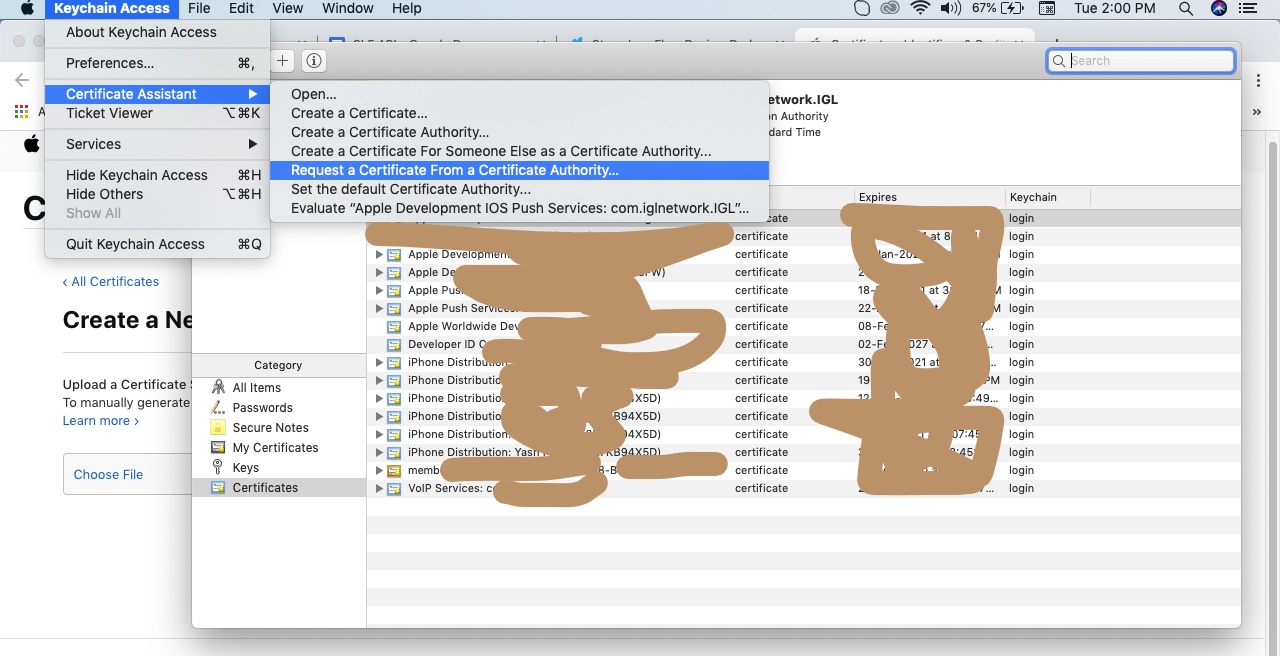
Save this Certificate to Desktop and than Upload it to here.
 |
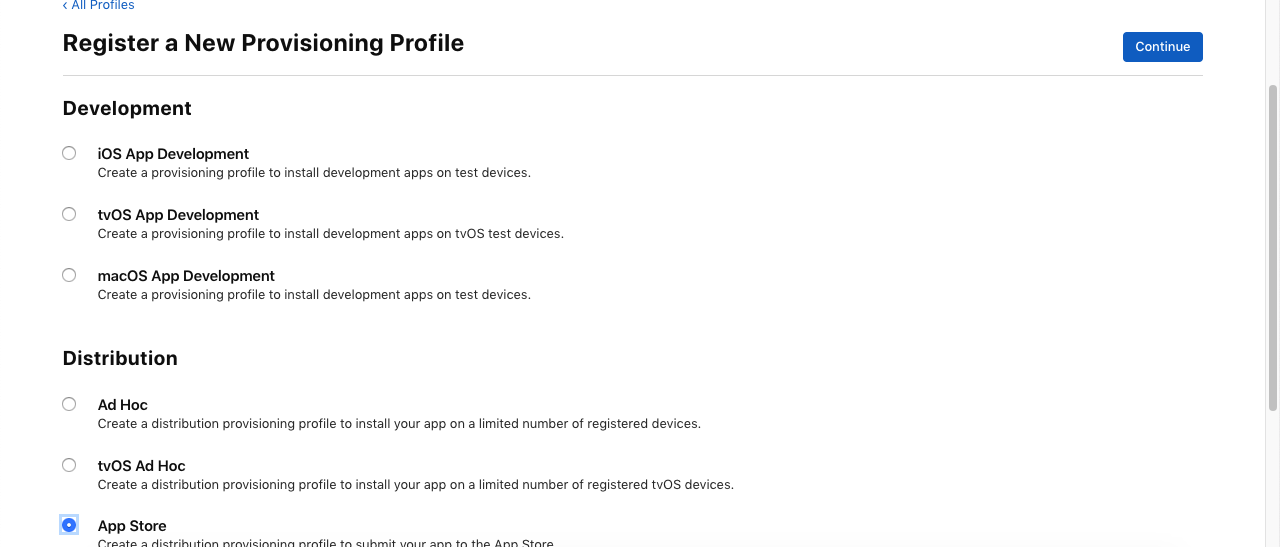
Step 5 ) Now create the Distribution certificate for the app store.
Go to Profiles from side menu options and Click on Plus Button to create a new.

Select the App Store option from below
 |
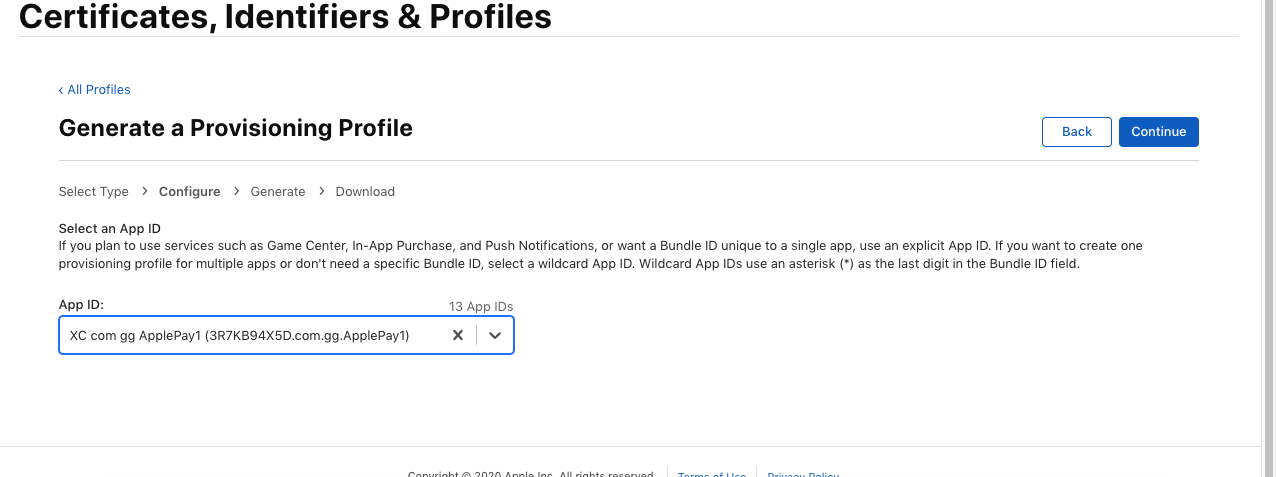
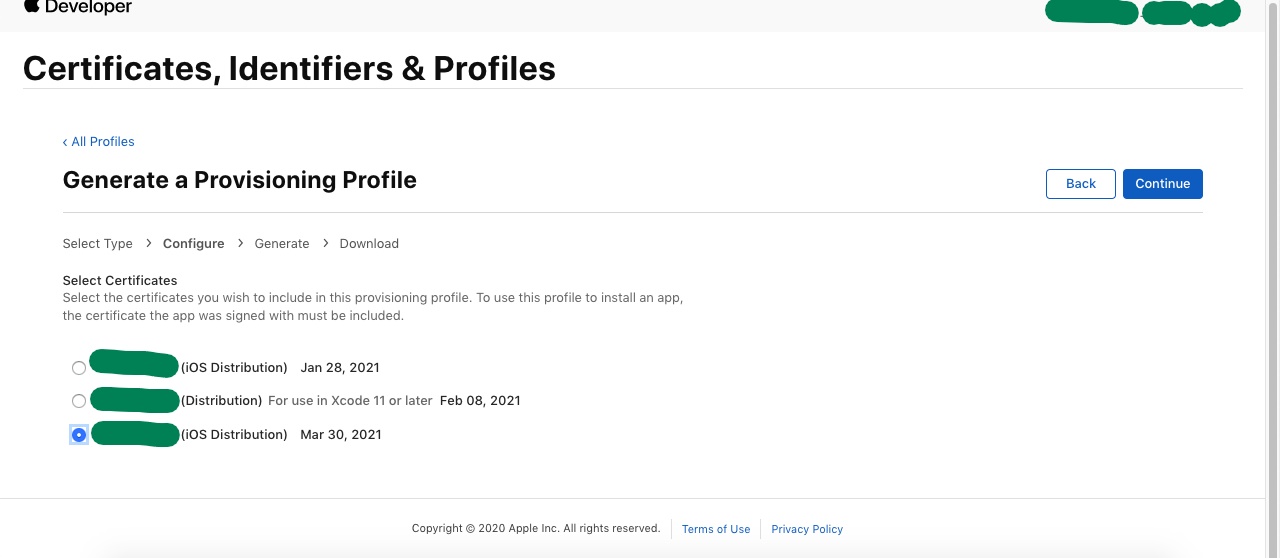
Then Select the AppID which you have create just previous.
 |

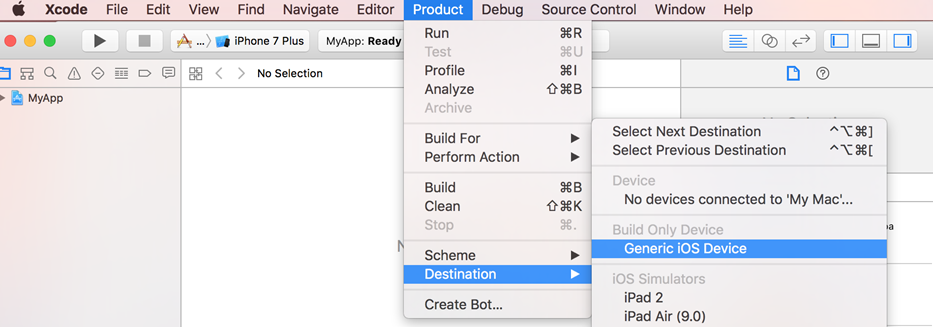
Now every thing is ready to push . Now we have to Build our App and Than without selecting any Simulator Create Archive . before that just check App build number and Build Version.
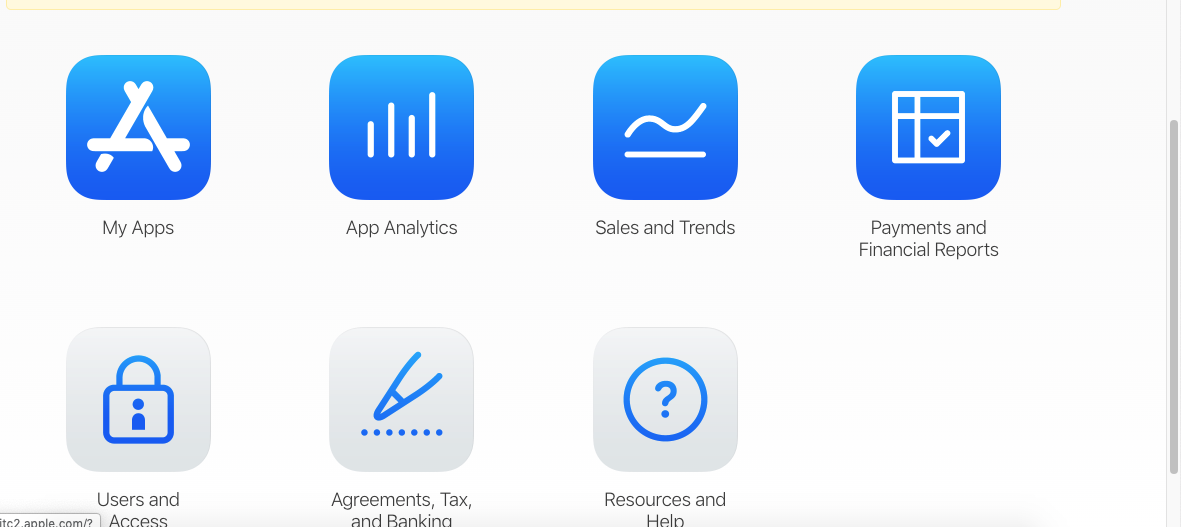
Step 7) Now again go to the apple developer account and select App store connect
 |
 |
Now click on the plus button which is left side
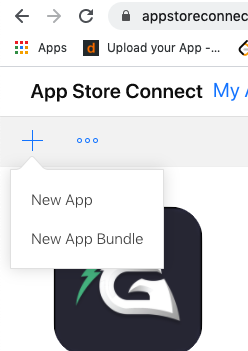 |
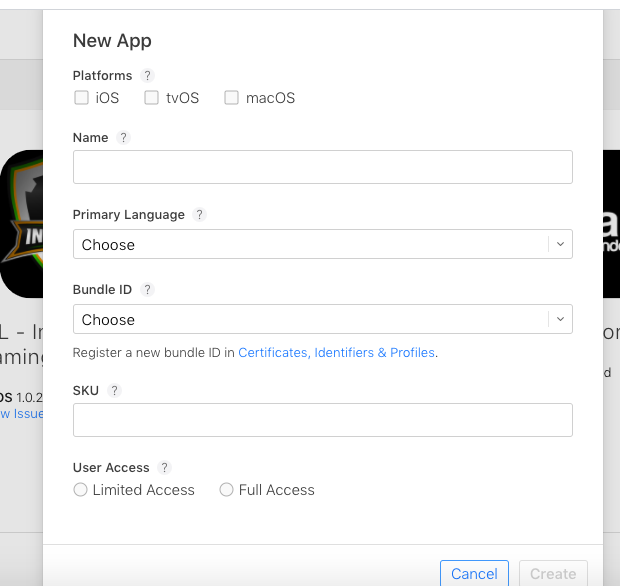
Now Select New App then there will open the New window like the below screenshot and select the ios checkbox to select the App id which you have created. and fill all the details very carefully.
 |
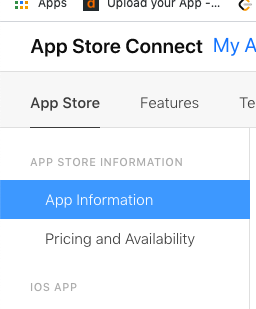
After creating go to inside the and fill all the information in the app information section and
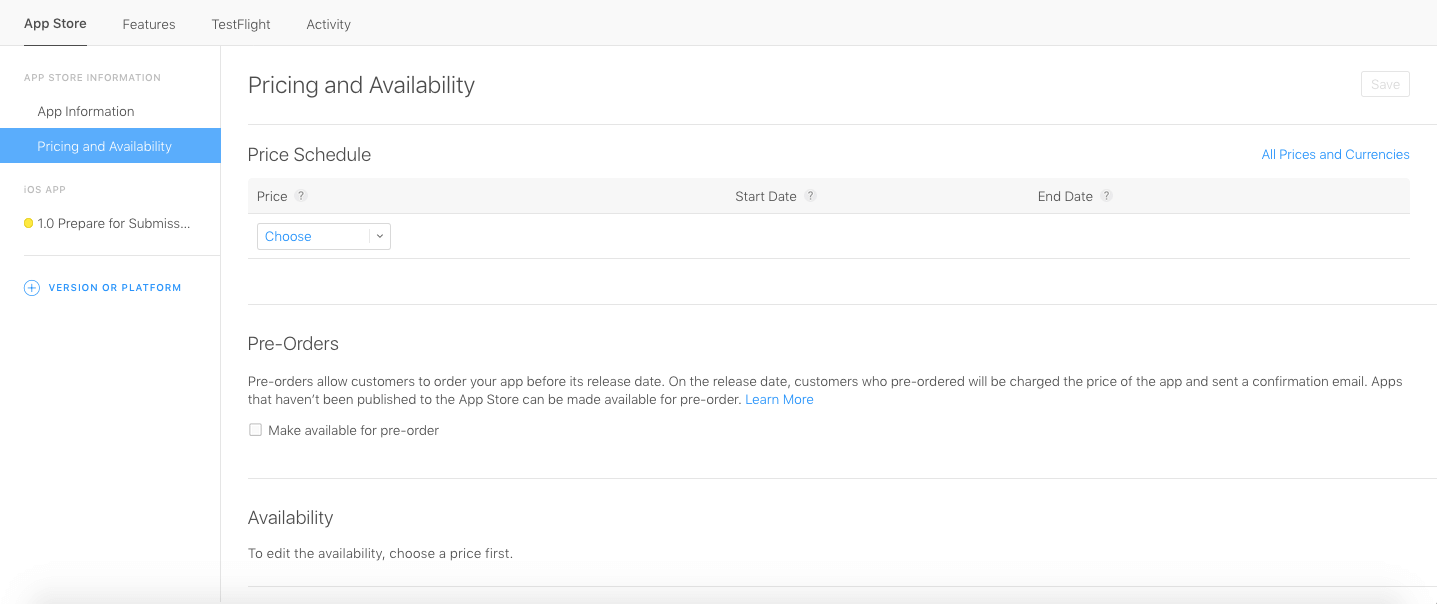
also fill the pricing section of your app see screen shot.
 |
Choose Category under App information
 |
Go to pricing >> Choose Suitable Pricing Tier (as per iTune Guidelines)
 |
Now Upload Screen Shots for iPhone and iPad
 |
Type App Description, Keywords and Support URL
Upload App Icon, Enter Rating and all details like Name, Email address, Contact number, e.t.c
 |
Provide Contact Information and choose to Automatically Release App
 |
Everything is ready from Developer Account.
Now Go to Xcode for further execution.
Step 8 ) Without Selecting any Simulator Create Archive with Generic Device.
 |

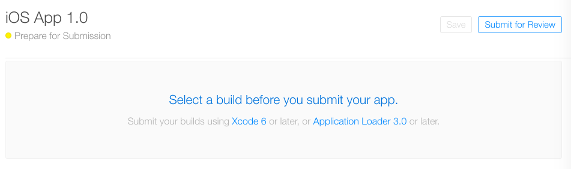
Click on Validate
When Validation will be Completed Than Click on Blue Button "Upload to App Store"
NOTE:- if you want to download a .ipa file than simply click on Export Button Option and save .ipa file to your System.
 |

Uploading will be depend on the Speed of your Internet

Now Uploading has Done. After Few Hours Go to Developer Account to see that the build which you uploaded right now is available there or not.

Now Build is Available here So, now its ready to submit for Review.
Just Check mark and Done than Submit For the Review.
NOTE:-
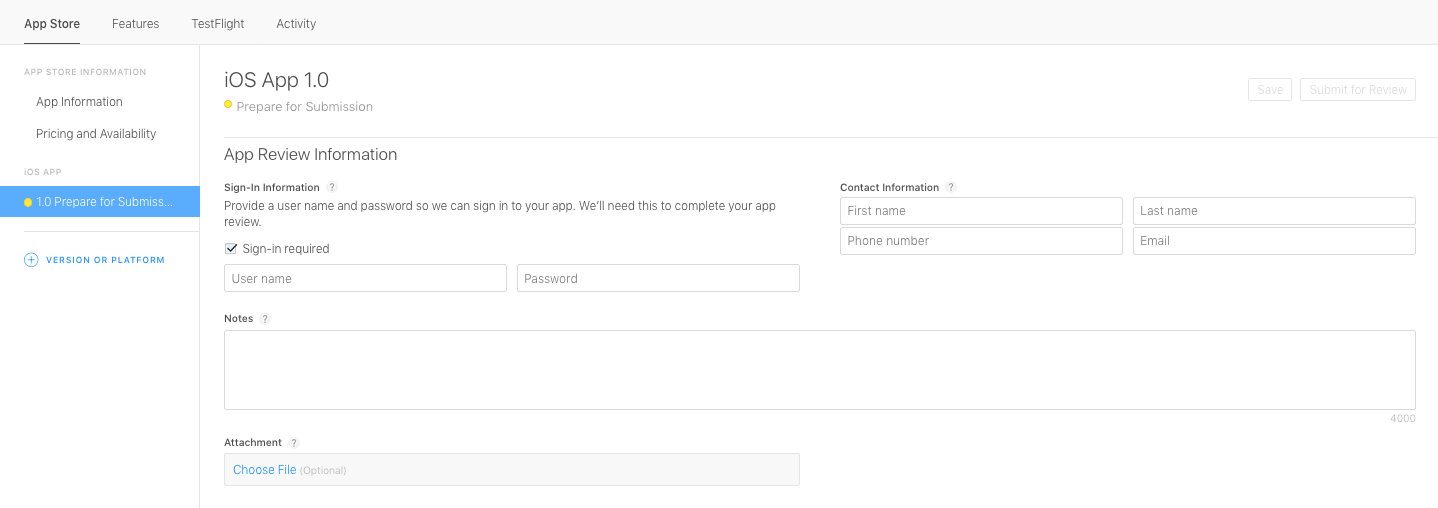
Before that Check Every Single Details which you provided is correct.
if your app retires Login and Registration process than you have to Mention One Demo Login id and Password.
FINALLY SUBMIT FOR THE REVIEW.


Great work brother 🔥
ReplyDelete